Tuesday, July 31, 2012

Ready Steady GO! Graphic 45 Book Tutorial-page one

Ok the big day has finally arrived!
This is tutorial one - the first of about 10 more. This is for all of you who have asked or emailed me in regards to how I make  my books. Graphic 45 have kindly agreed to let me do a continuing monthly tutorial for the next 10 months. You will be able to make a book which I have especially designed for Graphic 45 and a box to put it in. The tutorial will be posted on Graphic 45's blog on the last Tueday of each month, I will then post it on my blog at the same time.
The book will be for the special people and events in your life. Our first tutorial is for a page on us. You can include an up to date photo of yourself along with some of you growing up. Once we have all the pages made, you will be able to put them together in any order and not necessarily the order in which we will be making each page. I will be sellling kits at Seriously Scrapbooking, they will go online on the same day as the post. The first kit is $45 dollars and includes all the papers, cardstock, chipboard and embelishments you need + a colour copy of the instructions. Seriously Scrapbooking does post internationally if you need to buy a kit. Just click on the Janes Kits, then on Jane's online Graphic 45 book Tutorial. Seriously Scrapbooking also carry all the Imaginarium Designs Chipboard, so if you are an international person, you could just order the chipboard rather than the whole kit. I have listed the product codes in the materials list if you need them.
Seriously Scrapbooking.
Our first page is one using Graphic 45's A Ladies Dairy collection
so to get started,
The founation page - This page need to be made each month and is the founation on which all the other bits and pieces get added.
Instructions for creating a foundation page.
Each month you will need to make a foundation page. For this you will need two black cardstock.
Cut one to 8 ½ x11 inches- set it aside, cut your second one to 9 1/2 x 11 inches.
The 9 1/2 x 11 inches piece needs to be scored, place it in your cutter at 8 1/2 inch mark and score it, this will give you a one inch seam.

Completely fill in the one inch seam with strong tape.

Carefully adhered the 8 1/2  inch piece onto the 9 1/2 inches piece. Make sure you don’t go
over your scored seam, or your page will not fold. Once you have it on carefully fold the page over to check that it will shut.

Press firmly along the folded over piece, open up your page and check at the two pages line up nicely. Don’t worry if one of your pages is now wider than the other. You can trim it back to make them the same.

You need to add some more tape along the join of your foundation page. Adhered one strip of tape along one side of the join and about an inch of tape on the other side of the join.


A close up of the join with the tape each side. When you come to adhere your print papers, one piece will be an inch wider that the other page. The extra inch will need to be adhered over the top of the inch of tape on the foundation page.
Now we can start the pretty part of the page.
 1st Page .- A Ladies Diary.
A page about us.

Instructions for creating your 1st page.
Please follow the instructions carefully, lots of the papers are used in the mini book as well as for your page, so you need to cut them the way I describe or you will run out of paper! All chipboard needs to be black. All papers have had there edges inked.

Please note, I am only human and do make mistakes, I have taken every care while writing the instruction, and hope they make sense. It is quite hard to write instructions as I know what I mean; but this does not always translate into the instructions. If you are unable to work something out, then please ask a question in the comments at the end of the post and I will answer it for you as best I can.
Materials:
Graphic 45 Print Paper
2x Afternoon Tea
1x Fashion Plate
1x Timeless Memoir
1 ½ x Ageless Beauty
½ x Lasting impressions
1x Delicate Details
1x Focal Point
1x Moment in time
Imaginarium Designs – Chipboard
IDS0036 Small clock Face - 3 in a pack
IDP00032  phrase "where have the years gone
IDC0002 Swirl corners
IDA0006 Main letter set (small)
Tim Holtz Distress ink – Vintage photo
Imaginarium Designs Sponging block or Tim Holtz ink applicator
Color Box Fluid Chalk-chestnut roan
Brads
Ribbon
Flowers
2 ½ sheets black cardstock
3L 12x12 Adhesive sheets
From your first sheet of Afternoon Tea print paper cut a piece 8 1/4 x 10 ¾ inches. Please cut the 10 ¾ inch measurement first then cut it back to 8 ¼ inches. Keep the leftover pieces for your Mini Book
Cut your second sheet of Afternoon Tea print paper to 9 ¼ x 10 ¾ inches. Please cut the 10 ¾ inch measurement first then cut it back to 9 ¼ inches. Keep the leftover pieces for your Mini Book.


You need to completely cover the back of both print papers with adhesive. You can uses double sided adhesive paper or tape, if you use tape make sure you butt it together with no gaps in between each piece.


Adhere the 91/4 inch wide piece to your black foundation page. Try and have the same amount of black showing along the top and bottom on your page. Remember this print paper is one inch wider, so it will go over the join on your foundation page onto the other page. You should have tape on your foundation page to help adhere your print paper over the join. Don’t worry if your print paper is not on straight. You are going to add a border around the page. .
Carefully fold your page over, use your finger to run along the seam as you fold the page up and over.

Fold the whole page over and run your hand firmly along the fold to set the crease.


You need to adhere your 8 ¼ x 10 ¾ inch piece. Make sure you are away from the centre fold of your page or you page will not shut nice. To make it easier for yourself, don’t remove all the backing from your adhesive paper or tape. Just take a little strip off. Then if you don’t quite line it up right you can lift it off and try again. Don’t worry about lining up the spots, it is not really that important.


From your sheet of Fashion Plates print paper, cut five 1 inch strips from the left edge of your paper and one from the right edge  Save the bit in the middle for your Mini Book. (We need the top image for a page and the rest for a mat).. You will have six 1 inch strips, turn them over and ink the edges with chestnut roan ink.

From our sheet of Ageless Beauty print paper, cut the top right image and put it side for your Mini Book. Turn your print over; we will be cutting 6 strips from it.

You need to cut 6 strips from your Ageless Beauty print paper. Each one needs to be about ¾ inches wide. Use the above photo as a guide. Each one needs to be the same width, so make use you can line each one up to make them all the same. Don’t forget to ink the edges.


Now you need to adhere each piece on top of your Fashion Plate print paper strips. Make sure your Ageless Beauty strips end up in the middle with the same amount of Fashion Plate print showing top and bottom.

You should have six pieces ready to make your frame around the page.


Place one of your strips on your page. Adhere it in the middle with just a little bit of tape. Place a second strip on your page again with a little bit of tape. Leave the ends of the strips hanging over your page. You will trim them off later. If you mess up a corner the extra length still attached will let you do the corner again if you need to.


Place a ruler diagonally across the corner and over the strips. Line up the ruler with the inside point where the papers cross and where the papers cross at the outer corner and draw line with a pencil.


Following the pencil line, cut diagonally across the top strip only.


Place the top strip down and run a pencil along the diagonal cut edge.


Fold the top strip out of the way and cut the bottom one following the pencil line.


Line both corners up and check that the meet, you can adjust them if they don’t. If they are way out, move the strips down a little bit and do it again. Once you are happy with your corner, then repeat for the other three corners.


All four corners should look like this. Don’t worry if your corners don’t line up perfectly. Mine didn’t that’s why I used Imaginarium Designs chipboard corners over the top.
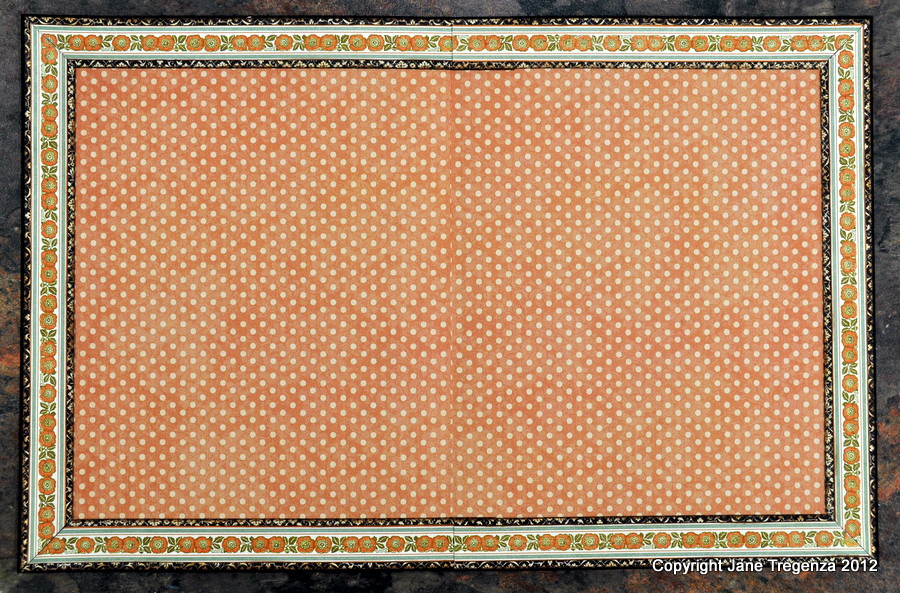

Before you attach each strip border, you need to cut them back in the middle where they go over the centre fold of your page. They will need to over lap in the middle of your book. The bottom strip needs to go over the fold in the middle of your book about an inch. The strip border, which goes over the top, needs to be cut away from the fold. If you are too close to the fold of your page with your top strip, your page will not close and your border will start to lift off. Now you can lift all 6 pieces off and adhere them back down with tape. Hopefully your corners will still meet. Remember the chipboard corners will help to hide any gaps. Your finished page should look like the page above. Now we can start decorating your page.


From a piece of your left over black cardstock, cut a piece to be 3 ¼ inches wide and 8 ¼ long. From a piece of Focal Point print paper, (you need to cut it from the bottom of your paper and not the side). Cut a piece 3 x 8 inches and adhere it to the black bazzil. Keep the rest of this sheet as you need it for your mini book. From your sheet of Timeless Memoir print paper cut a piece, 2 ¾ x 7 ¾ inches wide. Ink around the edges and adhere it to your Focal Point print paper.  Adhere it to your page using the above photo as  a  guide. Place 4 gold brads in the corners of your Timeless Memoir print paper. From your ½ sheet of Fashion Plate print paper, cut a piece 4 ¾ x 6 3/4 , cut a piece of black cardstock 4 ¼ x 6 1/4  and adhere it to the middle of your Fashion Plate print paper. Cut another piece of black cardstock to 5 x 7 inches and adhere the Fashion Plate piece to it. This will give you a triple mat for your photo. Add it to your page, using the photo above as a guide.


To finish your page, cut a border piece from Lasting Impressions print paper. I used the ladies with the hats. Adhere it over your photo. Layer three flowers and attach it to your page it a gold brad. Ink some chipboard letters black and add your name.
Add 4 black chipboard corners to finish your page.

Now for the mini book.
Instructions for creating your Mini Book.
Please follow my instructions carefully, as you will need the left over bits.
To make the mini Book you need to cut three pieces of print papers. It is important that you follow my instructions and cut them the same way I have. You need all the left over bits for inside the mini book.
1. Moment in Time Print Paper- cut it 8 inches high and 10 inches wide. Cut the 8 inch measurement first. To do this you will need to place the print in your paper trimmer sideways. Once it is 8 inches, take it out and turn it once. Put it in your trimmer and cut to be 10 inches wide.
2. Delicate Details Print Paper- cut it 8 inches high and 10 inches wide. Cut the 8 inch measurement first. To do this you will need to place the print in your paper trimmer sideways. Once it is 8 inches, take it out and turn it once. Put it in your trimmer and cut to be 10 inches wide.
3. Focal Point Print Paper- cut it to 7 ½ x 9 ½ inches. Cut the 7 ½ inch measurement first. To do this you will need to place the print in your paper trimmer sideways. Once it is 7 ½ inches, take it our and turn it once. Put in  your trimmer and cut it to be 9 ½ inch wide.
Two of these pieces are the same size, one is smaller. The smaller one will be going in the middle of our book. Each page is adhered to the back of one of the others.


Using Tim Holtz Distress ink and a sponging block carefully ink around all the edges of your three print pieces both sides.


A moment in time.
Fold all three pieces in half, so they stay the 8 inches and 7 ½ inches high but are only 5 inches or 3 3/4 inches wide.

Repeat with your piece of Delicate details print paper.


Focal point
This middle one is smaller than the other two.


 Place tape on the stripe side of your folded Focal Point page. Don’t remove the backing from the tape yet.
Now here some the “tricky part”. We have to adhere each one on top of the other. Make sure you keep your print paper the right way up, so you don’t end up with one page upside down.


Remove a little of the backing from the stripe side of your Focal Point page. Line it up with the Delicate Details page along the folded edge. Remember Focal Point is smaller than this piece, so make sure you have the same amount of Delicate Details showing top and bottom.
Remove a little of the backing from the stripe side and adhere Moment in Time over the top, making sure the folded edges line up and the top and bottom match with Delicate Details underneath . Once you have done this, open up your book and check that the three pages all line up and each page lays flat. If you are happy with it, remove the rest of the backing from the tape and stick Focal Point to the other two pages.


Your finished mini book should look like this. Now you can start decorating each page. You need all your scraps, including the left over bits from your page and black cardstock.


Use your image from your Ageless Beauty print paper. Find your left over bit of Fashion Plate print paper, remove the top image square from it first, then mat your Ageless Beauty image onto the left over piece. You still need to get two ¾ wide x 6 inch strips from it for your third page. Adhere a piece of ribbon across the front of the image and wrap the ends around to the back and adhere them down.


Punch a flower from your left over Afternoon Tea print paper (dot side). Choose a two paper flowers, glue the bigger one to the middle of your punched flower, glue the smaller flower into the middle. Find a small diamante buckle. Choose a piece of organza ribbon and tie it in the middle of the buckle with a knot. Trim the ends and glue it into the middle of your small flower. Place the finished flower over the top of the ribbon. Add a chipboard phrase inked black. Adhere it to the front of your mini book.


Inside First Page.
From your left over bits, cut a rectangle from the Delicate Details print paper. It needs to be 4 inches wide and 7 inches long. Ink around the edges. Don’t stick it to your page yet. You are going to work on it and once it is finished then you will stick it to your page.  From your left over bit of  the Moment in Time print paper, cut a rectangle 3 inches x 4 inches. Ink around the edges and adhere it to your yellow spot, use the above photo as a guide. Cut a strip of Focal Point print paper, 1 inch wide x 5 inches long. Make sure the strips are up and down. Adhere it over the top and about an inch up from the bottom of your yellow spot. Wrap the ends around to the back and tape them down. Adhere a piece of black ribbon over the top of your stipes and wrap the ends around to the back and tape them down. Choose two paper flowers of your choice. Ink an Imaginarium Designs mini chipboard clock black and glue it to the middle of the biggest flower. Glue the smaller flower in the middle. Use a pearl brad to attach the finished piece to your spot rectangle. Once this is finished, you can adhere to the left side of your 1st page. Add four photo corners. Cut a photo mat 4 inches x 6 inches and adhere it to the other side of your page
Add a photo to finish. I have left a space above the flower and clock on the left side of the page for your journaling.


Second Page
From your left over pieces of Moment in Time print paper, cut two pieces 4 inches x 4 ½ inches. Ink around both pieces and adhered them to your pages. Cut a square of Delicate Details print paper (spot side) to 3 ½ inches x 5 inches. Mat it onto a piece of your black cardstock. From your left over piece of Fashion Plate print paper cut the top image out leaving a little bit of the pink all the way around. Adhere it to your piece of yellow spots. From your ½ sheet of Lasting Impressions print paper, cut out a piece of the lace border and add it to your page. Use the above photo as a guide. Add four photo corners and place the finished piece to your page on the right side as shown in the photo. Cut a piece of black cardstock to 4 inches x 6 inches and adhere it to the left side of your page. Add a photo to finish the page.


Third Page
From your left over pieces of Afternoon Tea print paper, cut two pieces of 3 inches x 4 ½ inches. Ink around the edges of each piece and adhere them to your page. Cut two pieces of Fashion Plate print paper, ¾ of an inch wide x 4 ½ inches long. Adhere it to your page as shown. Cut two squares of Focal Point print paper, make sure the stripes are the right way, they need to be 1 ½ inches x 6 inches. Adhere them to your page as shown. Add photo corners to the top. Cut two pieces of Focal Point print paper to 1 ½ x 3 inches, ink around all the edges and adhere them to your page. Punch four paper flowers from your left over Afternoon Tea print paper, glue two together and add a smaller paper flower to the middle. Push a gold split pin in the middle and glue the finished flower to your page. From your ½ sheet of Lasting Impression print paper, cut two postage stamps (the ladies) and add one to each page. Use the above photo as a guide. Cut two photo mats to 3 ¾ inches x 4 inches and adhere them onto your page.  Add your photo to finish the page.


 This finished book needs to be adhered to the right side of your page.
 Finished at Last!
Hope you have  managed to do your page following my instructions, if you have a question or are not sure about something, then just post a comment here and I answer it  for you.
I am hoping that lots of you will have a go at doing this special project each month with me.
I will try and create a special tab on my blog with the tutorial there if I can.
So see you all next month for the next page.
hugs to you all
Jane

Monday, July 23, 2012

Graphic 45, Want 2 Scrap and Art Glitter's Blog Hop

Graphic 45, Want 2 Scrap and Glitter Arts are having a blog hop all this week. Today it is my turn to share my project with you all. You can hop from my blog to the other Graphic 45 Design Team Members Blogs each day. Leave a comment on Graphic 45 Blog to go into the draw to win a prize.


I was given a chipboard board Album, and some lovely pearls, crystals and gems to play, with along with some beautiful glitter from Art Glitter.
 I decided to do something different rather than an album. My daughter did a trip last year with her two sisters to the UK and USA. It was a Harry Potter theme tour, so the new Happy Haunting range was perfect for this project. I did a different theme for each "page" of my wall hanger.

My Album was a gate fold album, with two wrought iron gates on the front. I inked them black and used them on the pages. Because it is a gate fold every page was a 1/2 size. I covered them with my favourite papers, punched more holes in them and used rings to link them all together. I picked out my favourite ribbons and tied them to the rings.


I covered the chipboard  with "Enchanted Garden" and made a frame using "Friday Night"  around the edge. I cut some of the images from "Jolly Jack-O-Lantern  and added them to my page. The letter stickers were perfect for adding Anna's name. The wrought iron part of the album was the perfect background for my photo. I used some of the Art Glitter I had received on my sunflower.


  I covered this page with some of "Word Play" and added two photos. Some pearls from Want 2 Scrap were the perfect addition for this page.


 I covered this page with "Trick or Treat" and cut a fence from "Midnight Magic" and mounted it with 3L foam squares. I added some green pearls from Want 2 Scrap. I found the word stickers from my sticker sheet were a nice touch.


 For this page I used "Jeepers Creepers". I used the other wrought iron gate and tucked two images from "Jeepers Creepers".


 For my last page I used "Bewitched" and "Halloween Greetings" along with an image from "Jeepers Creepers".
 On every page I used a card from "Jeepers Creepers" for my journaling. I used the fine Art Glitter and used the glue that came with the glitter  to outline the spiders web on every card. It worked like a treat, and I wish it showed up more in the photos.
 When I showed it to Anna, she loved it, a great reminder of her big trip away.
Don't forget to check out every ones blogs and leave a comment on Graphic 45's blog to win.
Want 2 Scrap's Design team will also be showing projects. To see their work visit their blog and leave a comment there.
Want 2 Scrap
Also make sure you visit Art Glitters Blog to see the amazing work their team has done as well.
Art Glitters
Looks like everyone has been very busy!
Below is the shedule for the week
Monday, July 23rd
Jane Tregenza: http://janetregenza.blogspot.com/
Maiko Miwa: http://shiny-scrap.blogspot.com/
Tara Orr: http://eachmoment-onlyonce.blogspot.com/
Tuesday, July 24th
Alberto Juárez : http://vintageodyssey.blogspot.com/
Gloria Stengel : http://gloriascraps.blogspot.com/
Nicole Eccles: http://www.nicoleeccles.com/
Wednesday, July 25th
Arlene Cuevas: http://butterflykisseswithlove.blogspot.com/
Jim, The Gentleman Crafter: http://thegentlemancrafter.typepad.com/
Betto Cesare: http://scrapguys.blogspot.com/
Thursday, July 26th
Clare Charvill: http://mycreativespirit.blogspot.com/
Kristin Wilson: http://www.kristinwilsonhandmade.com/
Sharon Ngoo: http://glooshmoo.blogspot.com/
Friday, July 27th
Denise Hahn: http://www.inmyblueroom.blogspot.com/
Laura Denison: http://www.followingthepapertrail.blogspot.com/
Susan Lui: http://luv2scrap-pages.blogspot.com/

Thanks so much for looking.
Jane
PS By the way, I have finished the 1st page for my Book Tutorial, can't wait to share it with you. I will be selling kits for it at Seriously Scrapbooking once the tutorial has been shown on Graphic 45's blog.
Seriously Scrapbooking
just click on Jane's Kits and then Book Tutorials Kits. The kits will go online on the last Wednesday of each month. The day after the tutorial has been shown on Graphic 45's blog.

Two Blog Hops in One Week!

Well it's a very busy week for me this week!, I have two blog hops in one week!

One is with Graphic 45, Want 2 Scrap and Art Glitter. I have made a special project for my daughter Anna. I will be sharing it on my day, which is Monday US time.
Graphic 45 is giving away two prizes. You will need to leave a comment on their blog and facebook page to go into the draw.


The other blog hop is with 3L Scrapbook Adhesive and ColourCore Cardstock.


My day is the 24th and I have a lovely layout to share with you. I am now in Perth visiting my baby sister and nieces. Those of you not living in Australia, it is a three hour flight from where I live.

 Looks like being a very busy week.

Thanks so much for looking.
Jane.

Saturday, July 14, 2012

Big Announcement on Graphic 45'g Blog Today

Graphic 45 have a big announcement (for me)  on their blog today, check it out and leave a comment!
I have been flat out for the past two days, cooking for a fun raiser. I am doing a French three course meal for 140 people, so I have been a bit busy planning it all. I sent some projects off to Graphic 45 for CHA early this week, hopefully they are there by now. I will post again on Sunday, once I catch my breath back in regards to the announcement and give you some more information.
Here is a clue

thanks
Jane

Thursday, July 05, 2012

Graphic 45's new Collection


Graphic 45 are showing images of their new line "Song Bird" and has an Asian Theme. As yet I have not seen it but the USA design team are already working with it and are very excited.
It was my turn to be featured on the blog today, I have put a tutorial up for anyone who would like to  have a go. The kits is for sale at Seriously Scrapbooking.. Just click on the link to purchase one. They do ship international, you just need to purchase one and they will send you a paypal link with the postage. If you are happy you do ahead and pay, once they have your payment they will post it to you.
thanks for visiting
Jane

Saturday, June 30, 2012

A Tutorial online at 3L Scrapbooking Adhesive

Hello Everyone
I have done an on line Tutorial  for 3 L Scrapbooking Adhesive and it's being featured on their blog today. It is one for my family history album. If you want to have a go and doing this, then visit their blog and check it out. All the instructions are there.
thanks
Jane
3L Scrapbooking Adhesive

Monday, June 25, 2012

Christmas has come Early at Graphic 45

Hello Everyone
 Christmas has come early at Graphic 45, make sure you check our their blog for the lastest new papers. This lovely collection will be perfect for all the wonderful layouts you will need to do after Christmas or for all the amazing hand made Christmas cards you need to make to cellebrate the festive season.
Just look at the border on this paper, can't wait to get my hands on this collection and start cutting!


This one is going to be pefect for cards. The images are small and so pretty.


Wouldn't this make a  beautiful box fill with hand made ginger bread men as a special gift for Christmas.
Graphic 45 are showing more of this lovely collection on their blog and to celebrate releasing this new collection they have a compition for you. Here is what they had to say.
"You'll also get a chance to win this new collection before it's even available in stores! All this week we're giving away 4 prize packs every day! Each winner will receive an 8x8 paper pad and both coordinating chipboard die-cuts from Nutcracker Sweet! That's 20 prizes this week alone! Wow! Just leave us a blog comment today for your chance to win! Yay!
So make sure you visit Graphic 45's blog and leave a comment to go into the draw to win this prize.
thanks for looking
hugs
Jane
PS Thanks so much for all the wonderful comments you left for me in regards to the May Arts blog hop, I have had a lovely time reading them all.
thanks again.


Friday, June 22, 2012

My May Arts layout

 Here is my Layout for the May Arts and Graphic 45 Blog hop. I was too late in sending it to Graphic 45 to be included in the hop and I am so sorry for letting them down. 
I receive a lovely bag of May Art ribbons to play with and decided to use them on a layout along with Graphic 45's new Paper Range " A Ladies Diary".  The May Arts Lace was not quite the shade of pink I needed. So I dyed it using Tim Holtz's Distress reinkers.
 I found that 3/4 of a cup of hot water and two full eye droppers of ink gave me the perfect shade.
I adhered the lace over the top of some lovely gold ribbon I had received and layed them on my layout over lapping them to give me a criss cross effect. I added some of the lovely "A Ladies Diary"stickers. A soft silk bow using more of May Arts ribbons  finished my page.
I love the soft shades of colours in the "A ladies Diary" collection and the May Art ribbons were a perfect match.
thanks for looking.
Please visit all the other ladies and Gents involved with the Blog hop, leave a comment to go into the draw to win a prize. I have included links to their blogs below.
thanks
Alberto Juárez : http://vintageodyssey.blogspot.com/
Gloria Stengel : http://gloriascraps.blogspot.com/
Nicole Eccles: http://www.nicoleeccles.com/
Jingle: http://www.justjingle.blogspot.com/
Charlene: http://www.paperandinkplayground.com/
Tuesday, June 19th:
Arlene Cuevas: http://butterflykisseswithlove.blogspot.com/
Jim, The Gentleman Crafter: http://thegentlemancrafter.typepad.com/
Betto Cesare: http://scrapguys.blogspot.com//
Vera: http://www.lingshappyplace.blogspot.com/
Latrice: http://www.latricemurphy.blogspot.com/
Karen: http://thebalddragonfly.blogspot.com/
Wednesday, June 20th:
Clare Charvill: http://mycreativespirit.blogspot.com/
Kristin Wilson: http://www.kristinwilsonhandmade.com//
Sharon Ngoo: http://glooshmoo.blogspot.com/
Jenifer: http://stitchcutcreate.blogspot.com/
Tiffin: http://www.linwoodavenue.blogspot.com/
Thursday, June 21st:
Denise Hahn: http://www.inmyblueroom.blogspot.com/
Laura Denison: http://www.followingthepapertrail.blogspot.com/
Susan Lui: http://luv2scrap-pages.blogspot.com/
Jen: http://jenshearsdesigns.blogspot.com/
Candy: http://candyscraps.typepad.com/scraps/
Kimberly: http://serendipityvintagestudio.blogspot.com/
Friday, June 22nd:
Maiko Miwa: http://shiny-scrap.blogspot.com/
Tara Orr: http://eachmoment-onlyonce.blogspot.com/
Jinky: http://jinkyscrafts.blogspot.com/
Leah: http://www.blogger.com/goog_817840539

May Arts and Graphic 45 Blog Hop - Last Day!

Hello Everyone
I am finally home, having had an amazing trip teaching Graphic 45 Classes in Brisbane. I taught 9 classes over the weekend to over 250 ladies then other two classes in two local scrapbooking stores. While I was away we had very limited Internet access and some where along the way I missed an email in regards to this blog hop.
About Graphic 45:

Graphic 45 an award-winning scrapbook and paper crafting company­— owned and operated by a mother and her two daughters. Together we create vintage inspired crafting products that capture the flamboyant style of the 1920's and 30's - with vibrant color, irresistible texture and imaginative design to create products with decades-old appeal that's both fresh and familiar. Let our products inspire your next scrapbook layout, card, album or home decor project.
About May Arts:
May Arts Ribbon was founded in the early 1980’s in Riverside, Connecticut. The original products were high-end silk flowers imported from Taiwan, which were decorated using quality ribbons. The decorative ribbons proved so popular among customers that the business gradually evolved into a dedicated ribbon wholesaler.
As a family-owned and operated business, May Arts began a long-standing tradition of quality, affordability and exceptional customer service. We are dedicated to carrying on this same tradition by offering high quality products at competitive prices. Our friendly, knowledgeable staff is always happy to answer your questions or to assist you in placing your order.
May Arts carries a wide selection of quality ribbons to choose from; such as grosgrain, silk, satin, burlap and a variety of prints and patterns. All inventory is held in stock, so we can ship orders out right away—typically the same day.

Tomorrow it the last day, but it is not too late to get involved, all you need to do is visit the list of blogs below and leave a comment to go into a draw to win an amazing prize. Remember the more comments you leave the better. You can even go back to the 1st day and leave comments for those projects as well. I love working with May Arts ribbons and Graphic 45 two perfect companies who strive for excellence and achive it.

Monday, June 18th:

Alberto Juárez : http://vintageodyssey.blogspot.com/
Gloria Stengel : http://gloriascraps.blogspot.com/
Nicole Eccles: http://www.nicoleeccles.com/
Jingle: http://www.justjingle.blogspot.com/
Charlene: http://www.paperandinkplayground.com/
Tuesday, June 19th:
Arlene Cuevas: http://butterflykisseswithlove.blogspot.com/
Jim, The Gentleman Crafter: http://thegentlemancrafter.typepad.com/
Betto Cesare: http://scrapguys.blogspot.com/
Vera: http://www.lingshappyplace.blogspot.com/
Latrice: http://www.latricemurphy.blogspot.com/
Karen: http://thebalddragonfly.blogspot.com/
Wednesday, June 20th:
Clare Charvill: http://mycreativespirit.blogspot.com/
Kristin Wilson: http://www.kristinwilsonhandmade.com//
Sharon Ngoo: http://glooshmoo.blogspot.com/
Jenifer: http://stitchcutcreate.blogspot.com/
Tiffin: http://www.linwoodavenue.blogspot.com/
Thursday, June 21st:
Denise Hahn: http://www.inmyblueroom.blogspot.com/
Laura Denison: http://www.followingthepapertrail.blogspot.com/
Susan Lui: http://luv2scrap-pages.blogspot.com/
Jen: http://jenshearsdesigns.blogspot.com/
Candy: http://candyscraps.typepad.com/scraps/
Kimberly: http://serendipityvintagestudio.blogspot.com/
Friday, June 22nd:
Maiko Miwa: http://shiny-scrap.blogspot.com/
Tara Orr: http://eachmoment-onlyonce.blogspot.com/
Jinky: http://jinkyscrafts.blogspot.com/
Leah: http://www.blogger.com/goog_817840539

So many Talent people involved with this, there is sure to be something for everyone. I have done a project and will share it here tomorrow.  Make sure you leave a comments for everyone.
Hugs
Jane

Friday, June 01, 2012

Cherish Treasured Memories Layout/Tutorial

Hello Everyone
It's frantic here at the moment with my husband and myself leaving in four days time to drive to Brisbane for the Papercraft expo. I still have some spots left in my Monday classes for anyone wanting to attend. I have over 270 kits done and have boxes everywhere. I am teaching at a couple of stores in Brisbane afterwards as well.


Thursday,  Graphic 45 posted a layout of mine with a full tutorial on their blog. I have not had time to post here yet. It is one I did on Diane and myself, before I lost 10kg. It was taken at CHA last year. I took lots of photos at CHA this year, but my camera was playing up and I am not happy with them. I will be selling this as a kit with instructions at Seriously Scrapbooking in a few days. It was a delight catching up with Diane again and spending some time with her after CHA. She is a very special person. So kind and generous, my time spent with her is a treasured memory. Visit Graphic 45's Blog for the full tutorial if you would like to have a go at making this layout.
I will post some dates and sneak peeks of the two classes I am teaching in Brisbane after the expo over the weekend.
Off to do some creating, I have 11 projects to do before Tuesday! Including my first book tutorial for Graphic 45 and two projects for 3L Scrapbooking Adhesive. I also have three commission pieces for a magazine, and another set of patchwork squares. I am teaching Saturday, with a wedding in the afternoon, Sunday Service on Sunday with my sons 20th birthday party in the afternoon. If anyone knows how to get an extra day in between Saturday and Sunday - please let me know!
thanks for looking
Jane

Tuesday, May 15, 2012

My Introduction on Graphic 45's Blog and some exciting News

Hello Everyone
It's my turn for being introduced on the Graphic 45's blog. This years team is full of amazingly talented and wonderful people, so it will be very creative year for us all.
I have arrange with Graphic 45 to do one of my books on their blog. Each month I will post the instructions on their blog which will include a step by step tutorial. I will have kits for sale for each page at Seriously Scrapbooking's online store. This is a huge project for me, and the whole book will take about 10 months to do. I am planning to do it as a family album with pages for wedding, Christmas, baby with tags and more. The book will be about 7.5 inches wide and 9 inches tall. This the a great chance for all of you who have emailed me over the past few years asking me now I make my books to join me on Graphic 45's blog as I share the whole process with you all. I am planning to start in July, I hope to have sneak peek of the first page in June.
Now to share my latest book.
This is one I did for my final project for Graphic 45 for this year. It got me on the team again for my 3rd term. I did it on my Great Grand Mother. Florence was born in the late 1800's. She had 9 children and live in hard times with her husband out of work after being injure in a work accident.
With this book I started at the end of her life and work backwards. I remember her as a child, she passed away when I was about 12 years old. I had great fun researching her life, I found online newspapers from the time she was alive. I found the manifest lists for the ship her parents came out on to New Zealand from England. This was an amazing find, it contained information on the food, conditions, weather and entertainment, it even included the doctors report.  I found reports on dances held at the local tennis club which included details of the dresses worn by her daughters. School sports day results which had my grandfathers name and the events he won. So much information I still need to include in my book.

This is the first page in the book and is a pocket iwth more photos in.

This is the other side of the book and allows me to tuck more information and photos.


This page shows photos of my Great Grandmother over the years and the fashion she wore.


This is the other side of the page, it is a large pocket and includes a paper pattern from 1912, an advisement from 1889 and a mini book which folds out to allow me to have more photos.

This was a page with photos of Florance with her children. I made it a pocket and added 4 tags.


This page is on my Great Grandfather, and is a large pocket with mini books, photos and his death certificate.


I included information on my Great Grandfathers parents  and their family on this page. I added a copy of my Great Great Grandfathers will, which was written in his hand writing.

This page shows Florence's parents and some information on her side of the family.
I did 7 pages for this book, I will share some more pages another time,
Look forward to sharing the book making joy with you all
hugs
Jane