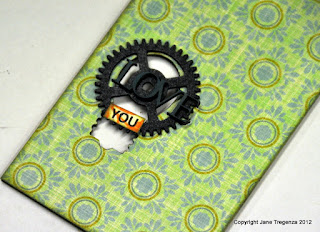
I used papers from Teresa Collins collection called Fabrications. The papers from this collection are thick and have a linen look to them. They are also double sided, so choose which patterns you like.
www.teresacollins.typepad.com
For this project I used 3L Adhesive Sheets, this makes covering the chipboard project quick. I used it for the larger pieces of my project, manly the front and back pieces of the billboard part. I placed a piece of print paper slightly larger than the chipboard shapes onto the adhesive sheet. Lay the chipboard shapes on top and trace around the shapes. You can neither cut them out with scissors or peel the backing of the adhesive sheet and stick them down. You run then around the edge with a craft knife.
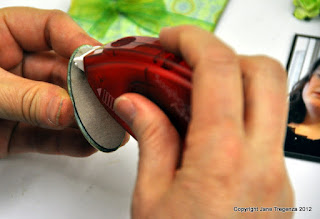
For the two base pieces, I found the E-Z runner work perfectly for this, as the runner is made up of small rectangles this lets you go around a curve. I put the tape onto the chipboard and taped them down to my print paper, then ran around the edge with a craft knife.
Use the E-Z runner to tape the two bases together.
Use the tape runner and cover the two stands with print paper, these then push into the bases and let you insert the billboard between them.
I used a large butterfly disk from K&Co and stuck it onto one of the print papers. I traced around it and cut it out. I used the tape runner again as I wanted to stick it onto the small oval chipboard shape and need to go around the curve of the chipboard.
Then I adhered it to the top of my billboard, again I used the E-Z tape runner.
I matted my photo onto black Bazzill. I added a photo corner to each corner of the matted photo then stuck it down again to another pieces of black Bazzill. I love photo corners and use the black one’s on nearly all by projects and layouts. I like the classic look it gives to my work. I used 3 large size 3D Foam squares (black variety), I love these squares and use them by the packets. I like the fact that this packet comes with two different sizes. Big ones for larger areas and small ones for my mini projects. I adhered the photo to my billboard on a slight angle.
For the flowers and leaves I used DodzRepositionable for the quote first to make sure it would fit, once I worked out where it needed to go, I removed one word/phrase at the time and used the E-Z Runner permanent tape to adhered them back down. The finished size of this project is about 6 inches high and 3 ½ inches wide.
01615 3D Foam Squares Black Variety
01300 Dodz Small
01644 E-Z Runner
01626 Photo corners black
3L scrapbooking Adhesives, certainly made this project quick and hassle free. They have an adhesive to cover any situation you may find yourself in when making a mini project like this. Whether you need your adhesive in big sheets to cover large areas or small pieces to go around curves, they have got it covered!
Imaginarium Designs - Billboard – You light up my life
IDW0026 Love, Cherish, and AdoreTeresa Collins Print papers
FAB101 Floral Garden
FAB103 Yellow Flower
FAB106 Petite Flowers
FAB109 Ornate Circles
KC3059451 Floral and Fauna butterfly Baubles
Colorbox fluid chalk inkpad – olive pastel
Vandoros Ribbon
Black Bazzill
Please visit 3L Adhesives Blog and leave a comment for me.
Thanks for looking, I am on another blog today as well, so I will post again later today.
Jane


I like your project and also like the details you give in your instructions. Thank you. Got here after seeing your mention on Paper Crafters Library.
ReplyDeleteI also found you after seeing your work at Paper Crafter's Library. Love your stuff! And thanks for the detailed pics and directions. Come back to the US and visit again!
ReplyDeleteYou are such a Rock Star! Great project! I really want to make one of those, hint hint! Hugs and Blessed Easter!
ReplyDeleteso lovely!
ReplyDeleteI just have to create one of these! Looks easy peasy, thanks for the instructions, HuGs, Valerie
ReplyDelete