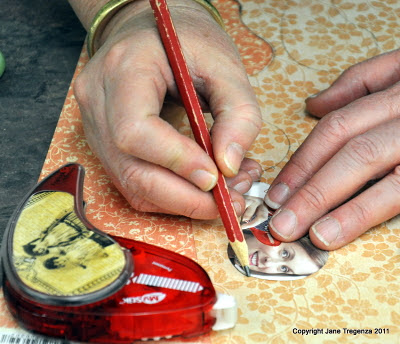
 I cut a large circle out of the paper and made small pleats in it around the edge using the runner to tape them together.
 I cut a strip of cardboard to fit around my head and taped the circle inside the crown.
 I cut a brim out of a piece of paper and added some pleats in the brim to make it interesting.
 The tape runner came with a custom panel in the side of it so you can put in a photo. I put in some of my favorite Graphic 45 paper. I used the piece of paper I took out to use as a template. I cut three dark pieces and three light ones out of the print paper . Use a paint brush and tightly wrap the first petal around the end of a brush.

 Spray around the top of the dark petal with water and fold it. Add some tape to the bottom middle of your petal and add to the first petal. Add another dark petal to make the middle of your rose.
  Once you have four dark petals, you can start adding pale petals.
  Put some tape halfway down the middle of the petal and each side of the bottom of the petal and wrap it around the last one. Keep repeating until your rose is big enough. You will need to pinch the petals to help them fit. Don’t worry if they tear as you can touch them up with a bit of ink.
When finished your rose should look something like this! You could keep adding more petals to make your rose bigger if you want to.
 I made three roses and added them to my hat. I tucked some organza ribbon in green to lift the roses and to hide the end of the roses. I added two peacock feathers from Imaginarium Designs sprayed black and a hat pin to finish it off.
I couldn't’t have made this hat without the tape runner from Scrapbook adhesives. It made the job so much easier and the finished project neater. If I had used glue it would have been everywhere! The tape seem to have lasted forever and I only ran out right at the end.
 I will post some photos of the Girls Night In with me wearing my Hat.
Materials used
Graphic 45 Once upon a Springtime- Spellbound, woodland fantasy and fairy folk.
Scrapbook Adhesives – my Stik
Colour box ink – rouge
Imaginarium designs – peacock feathers
Ribbons
Hat Pin.
Thanks so much for looking
Jane
What a lovely hat!
ReplyDeleteI would love to be at the girls night in but unfortunately being a bit geographically challenged makes it impossible but i hope everyone has a fantastic time.
Jane, you are incredible!
ReplyDeleteYou always blow me away with your masterpieces, and this one is BRILLIANT! WOW! Where do you get all your ideas from!? I'm totally in love with all your creations, and I absolutely LOVE visiting your blog, Jane, you always inspire me so much with your creative and different ideas.
thanks for sharing!
hugs,
Hanna
good information!!!
ReplyDeleteNice and use full information thanks for sharing...cyanoacrylate
ReplyDelete.