
I forgot that in the rush to get my masters projects off, I didn't take any photos. Its now 6pm and I am still at the shop having taught my Graphic 45 Christmas prayer to 10 lovely Ladies, who went home worn out. I was going to show you my masters, but I am too tired to take the photos and then edit them and then post them on my blog. It feels like a job for Monday. Instead I will put another of my pages on my blog for you.
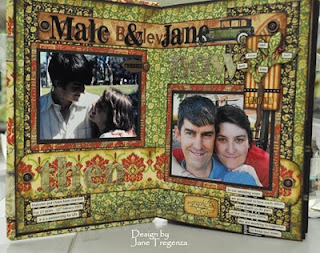
This one is on my Eldest Daughter, it may look familiar as I based a Graphic 45 layout on my book page. Because the book went to Graphic 45 and was to stay there and I loved this page so much I re-did it and changed it so I had it in a 12x12 layout for my album here in Australia. I used the Graphic 45 Bathing Beauty's on the front as a mat for Beth's photo. I love cutting out, so I cut out the three ladies in a row and shaped them to perch on the photo of the lady below. I had two cute photos of Beth, so one went on the front and I made a flap and used some beautiful K&Co hinges I had been saving for that special project! I have a beautiful photo Beth took of herself for the other side of the page. I used Tim Holtz's film strip, Maya road pins, 7 Gypsies Bracelet kit for Beth's title and ribbons. All the rub ons in the book are Creative Imaginations.
I love this range from Graphic 45, I think its the colours that speak to me and I use them over and over again. I also love German Scrap and the way it adds a border to my work. I also love using Graphic 45 to create frames and borders to my layouts.
Hope you enjoy.
Thanks for Looking.
Jane
PS Only 38 Sleeps until I leave for USA and CHA.


 This is the back of Beth's tag and is of Malcolm in


 The other layout I did was on Josh. He has just started work after finishing year 12 a few weeks ago. My little man is no more, and not been my little man for quite a while. I decided to keep this layout simple and use the papers to their best. The background paper is one of the core impressions. The pattered paper has a diamond embossed layer, which when sanded shows beautiful. I rubbed an embossing ink pad all over the paper and then tipped copper embossing powder all over it. I used a paint brush to remove the copper from the diamond pattern in between the embossed diamonds. This means that the sanded diamonds have a light dusting of


 Keep adding rows of curled pieces. As you work your way up the tree, you can use thinner pieces. Remember you can overlap the pieces on each row to help make them fit.
 Add glitter to each curl or crystals. You can decorate your tree as you wish. Try some white embossing powder for snow.
  When finished shape the tree again, as you have been gluing the pieces on your tree you will have
